How to install a PA Door for a Shed
This guide provides simple steps to install a PA door for your shed. Follow these instructions carefully for a secure and functional installation.
Required Parts
- 4 x Countersunk Rivet
- 2 x M12 Dynabolt
- 14 x Structural Tek Screw
- 2 x Small General-Purpose Holding Down Brackets
- 2 x Door Jambs
- Wall Tek Screws (use wall screws from kit)
- 1 x Door Knob with 2 keys
Required Tools
- Angle Grinder
- Combination Square
- Drill
- File
- Flat Screwdriver
- Safety Glasses
- Hammer
- Hammer Drill
- Rivet Gun
- Spanner
- Snips
- Tek Gun
Consumables
- Silicone
Steps
Cut the Opening
Measure and mark the area for the door opening on the shed wall. Use an angle grinder to carefully cut along the marked lines. Ensure the opening is clean and precise for a proper fit.

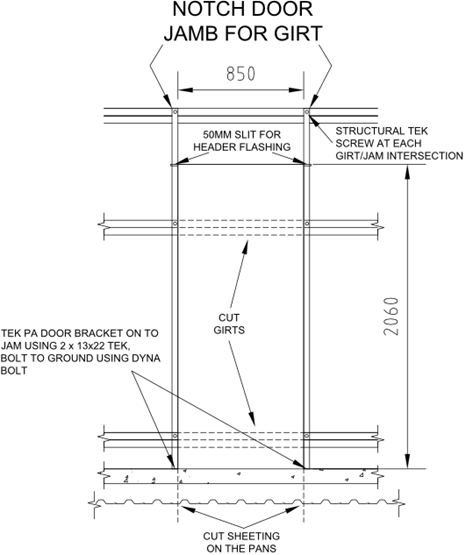
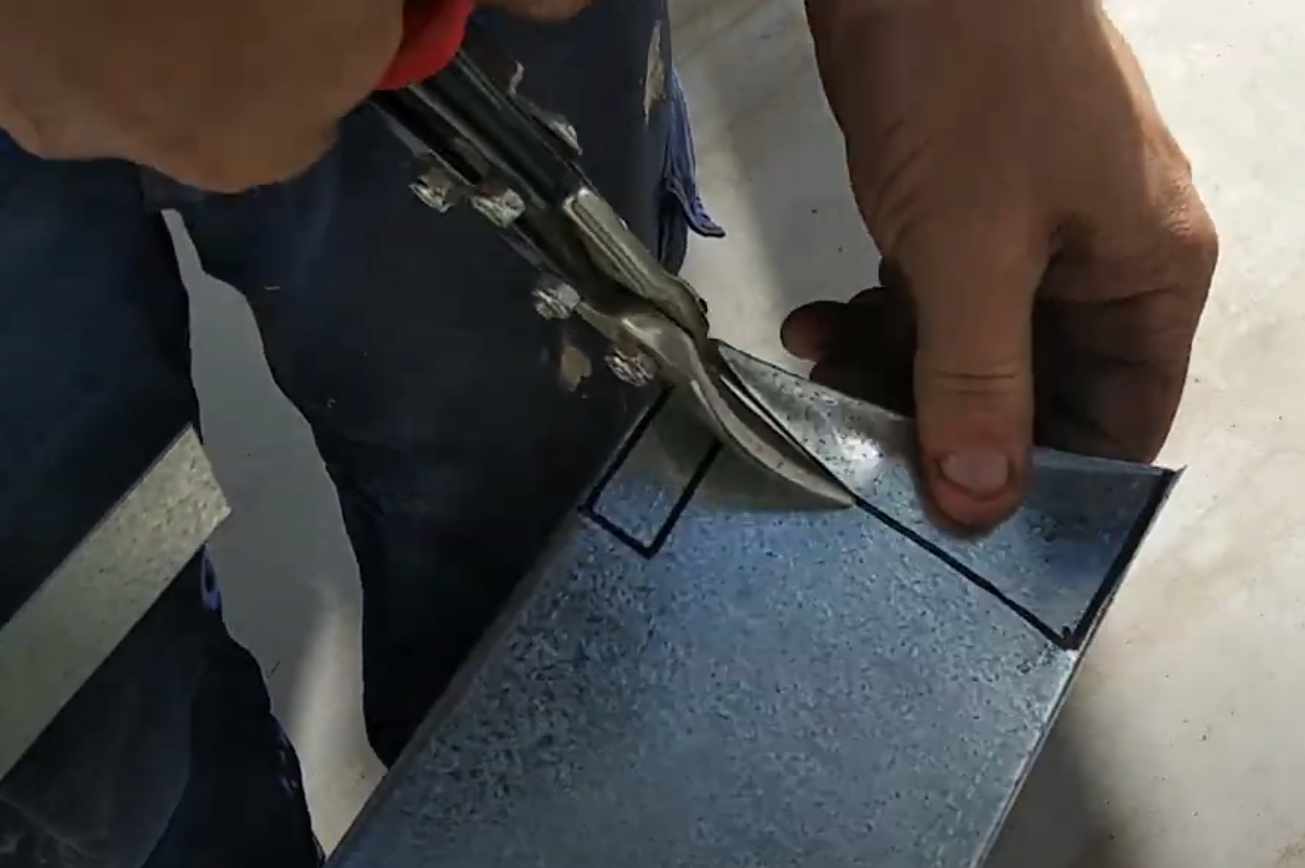
Notch the Door Jambs
Measure and notch the door jambs to align with the shed's structural framing. Use a file to smooth any rough edges for a clean finish.
Tek the Door Jamb
Secure the door jamb to the Z-frames using Tek screws. Ensure the jamb is straight and properly aligned with the door.
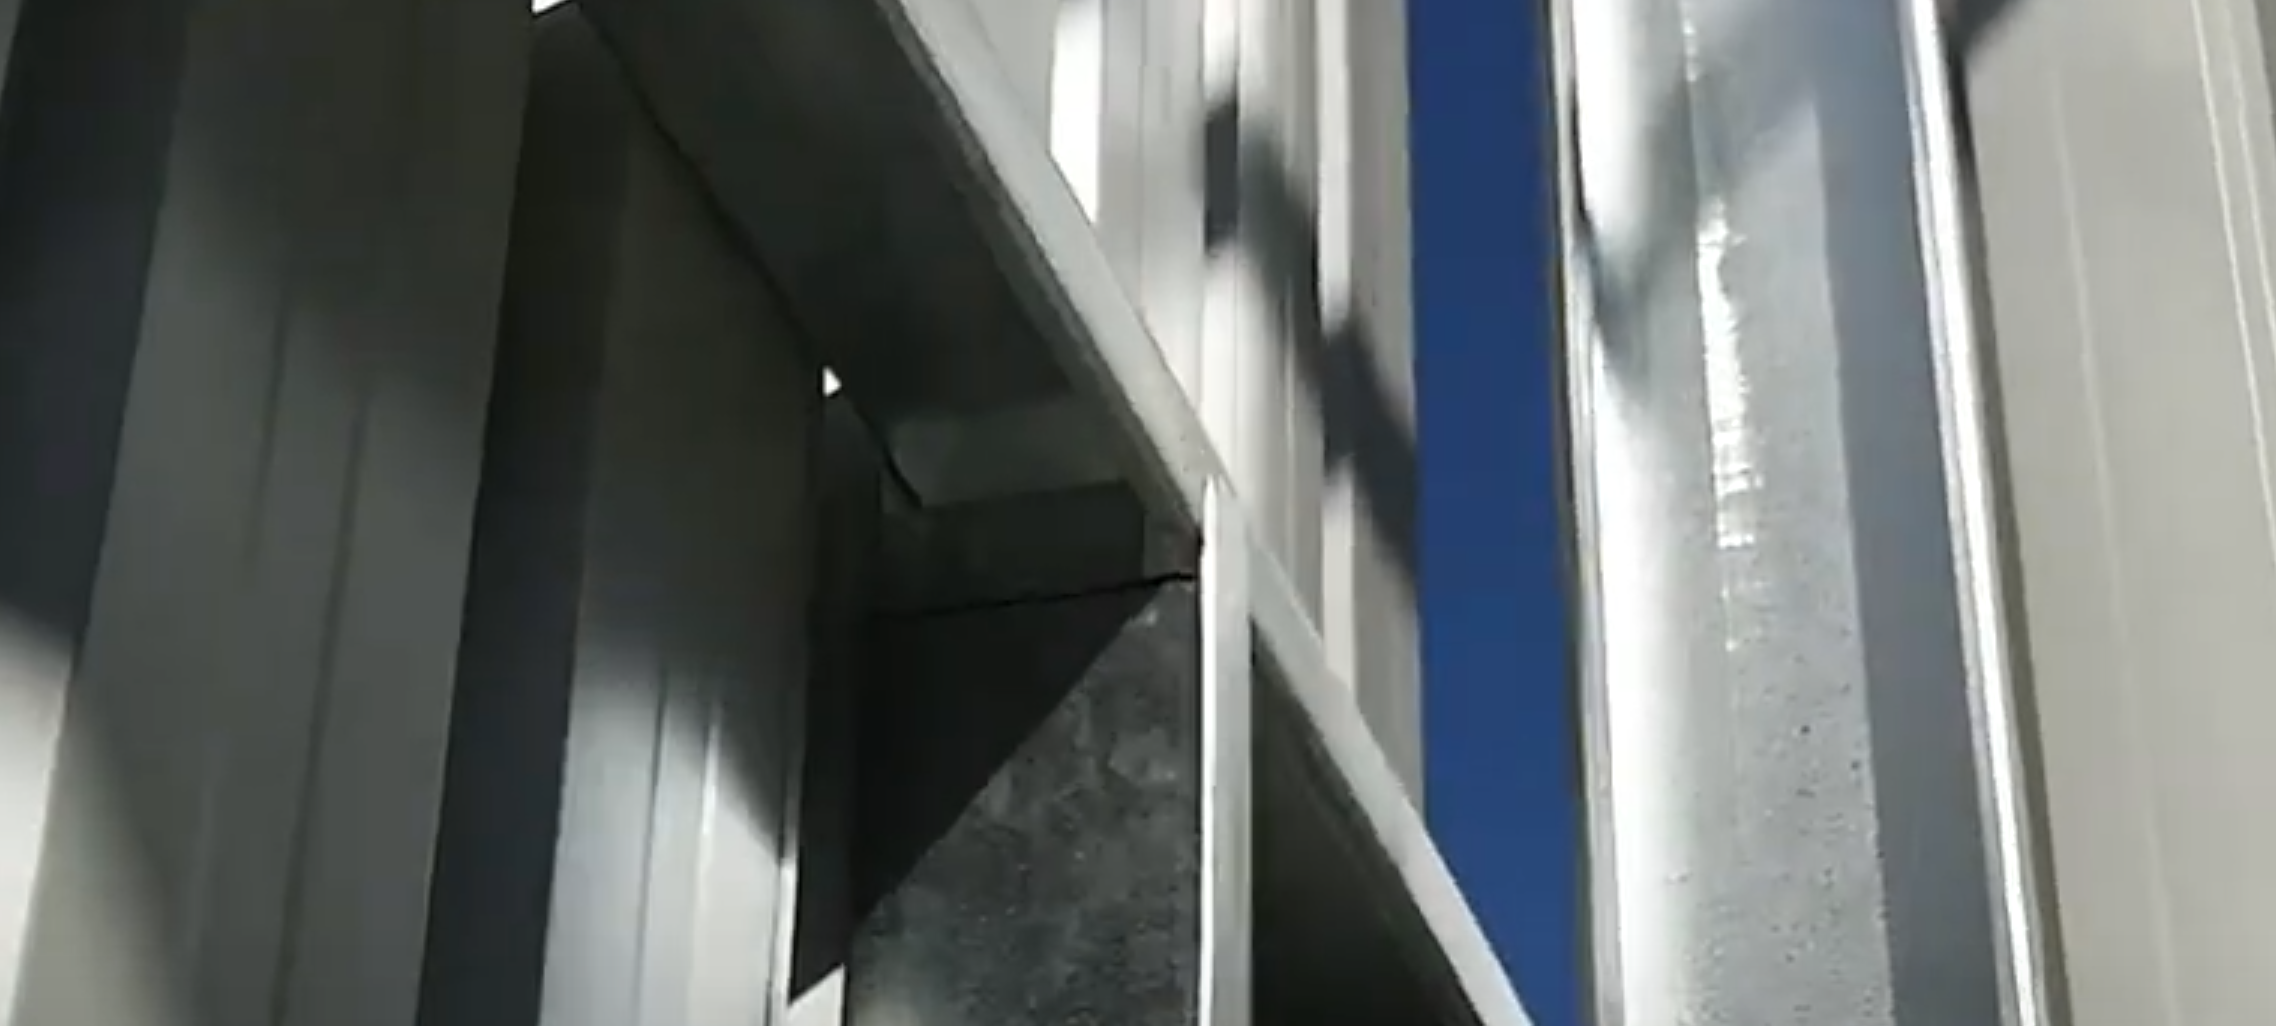
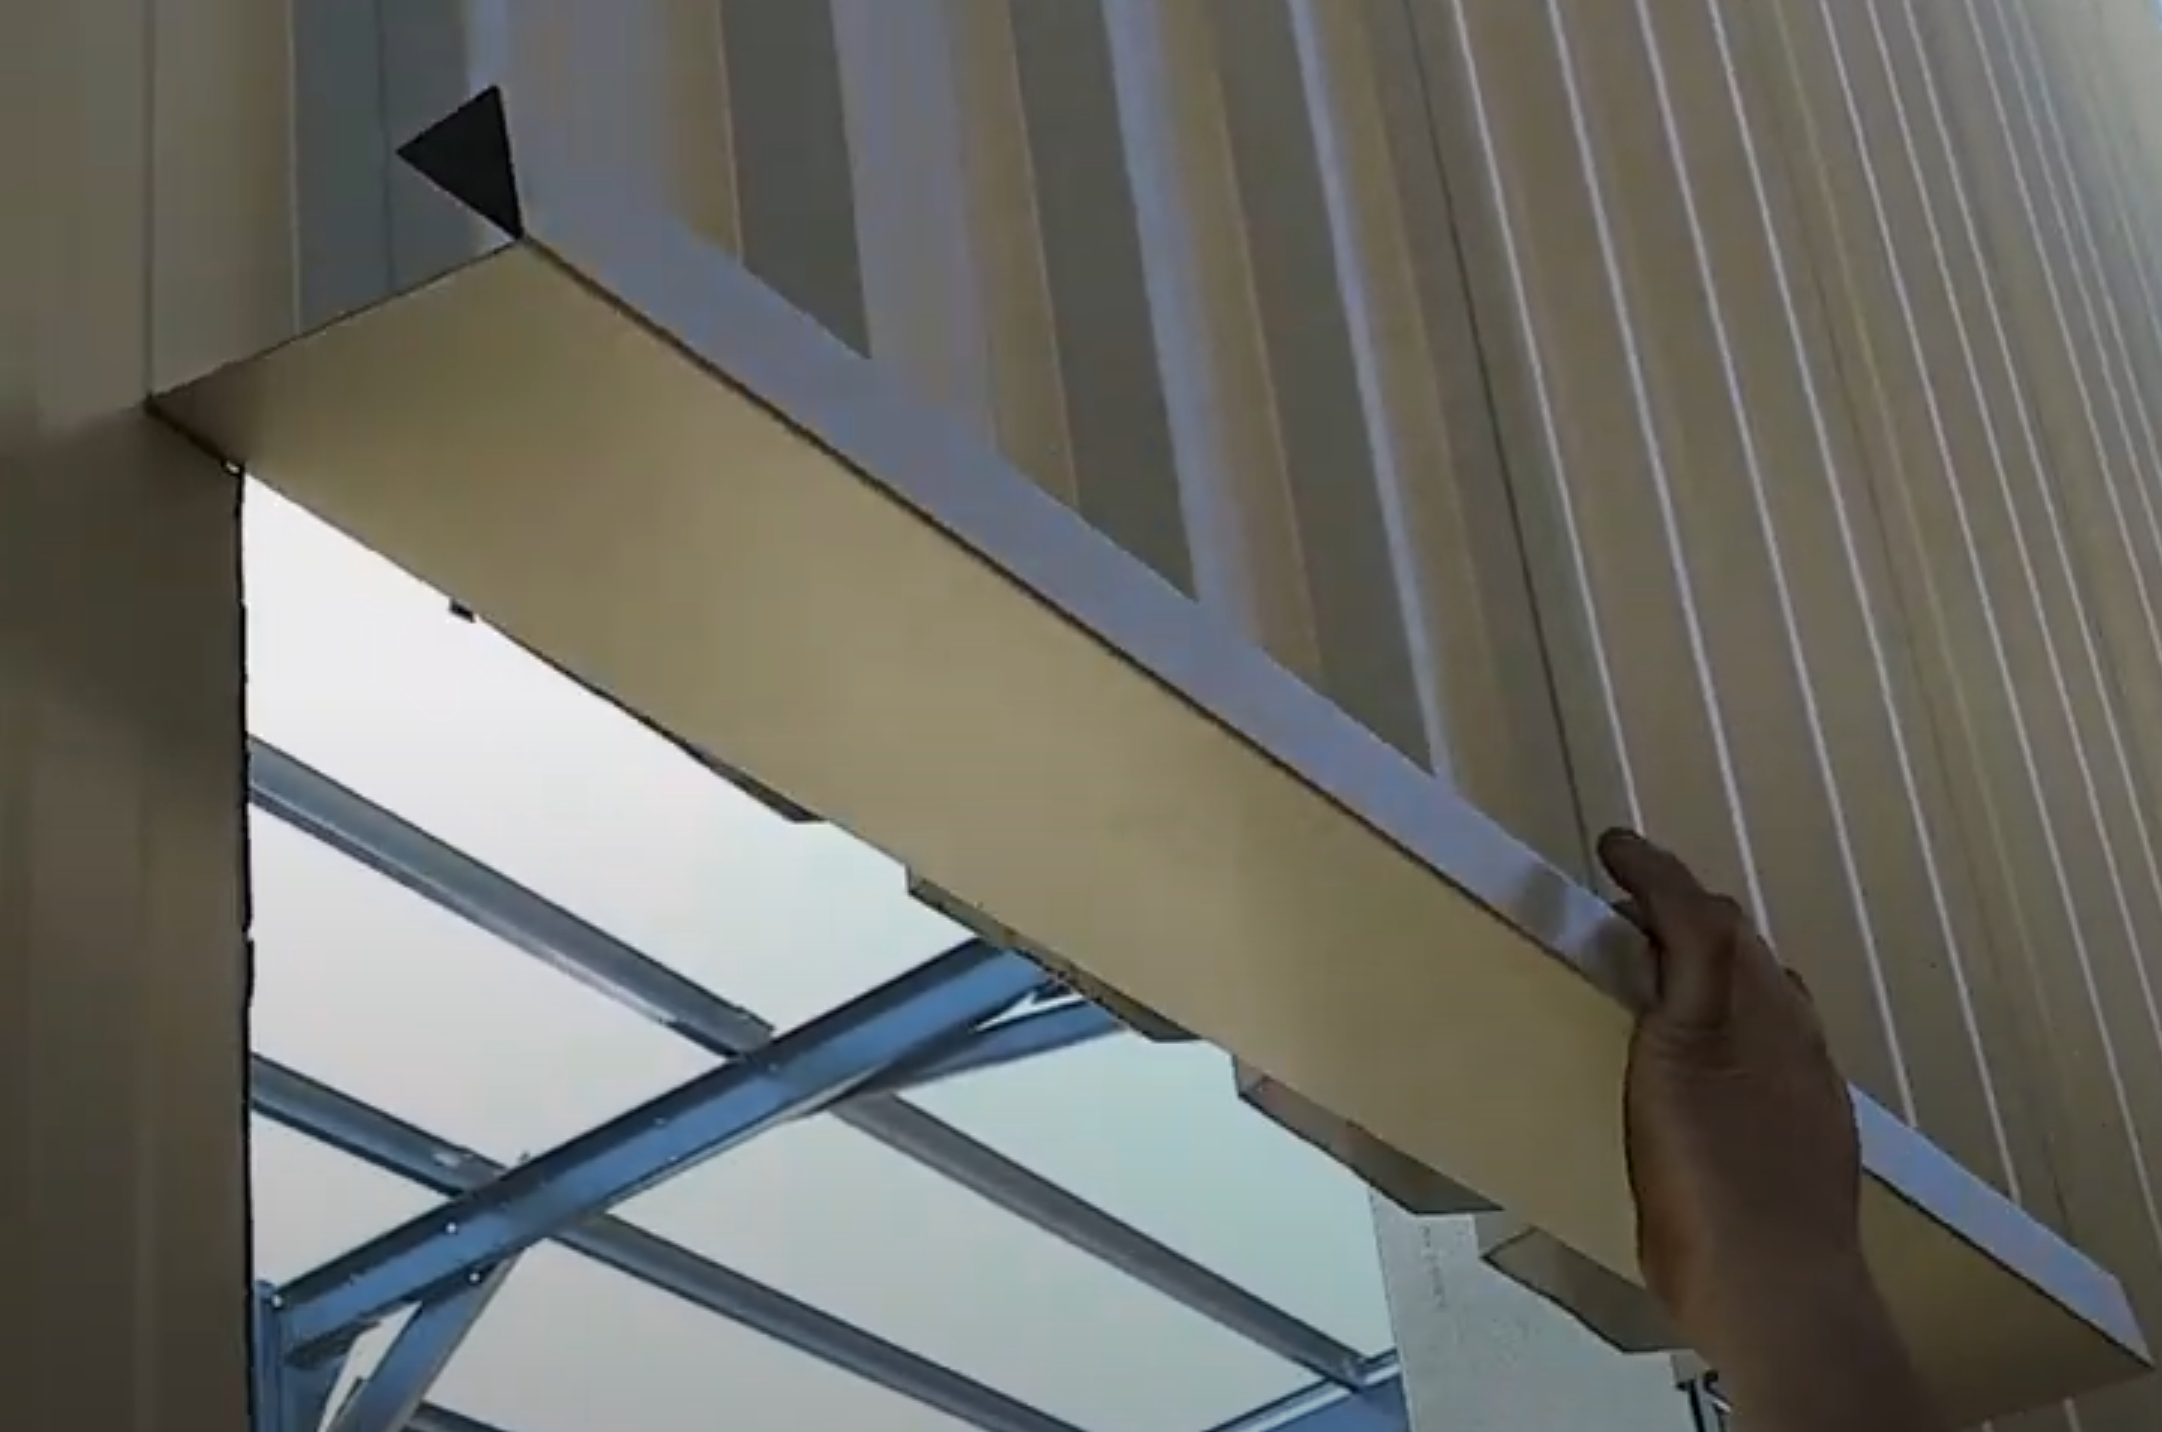
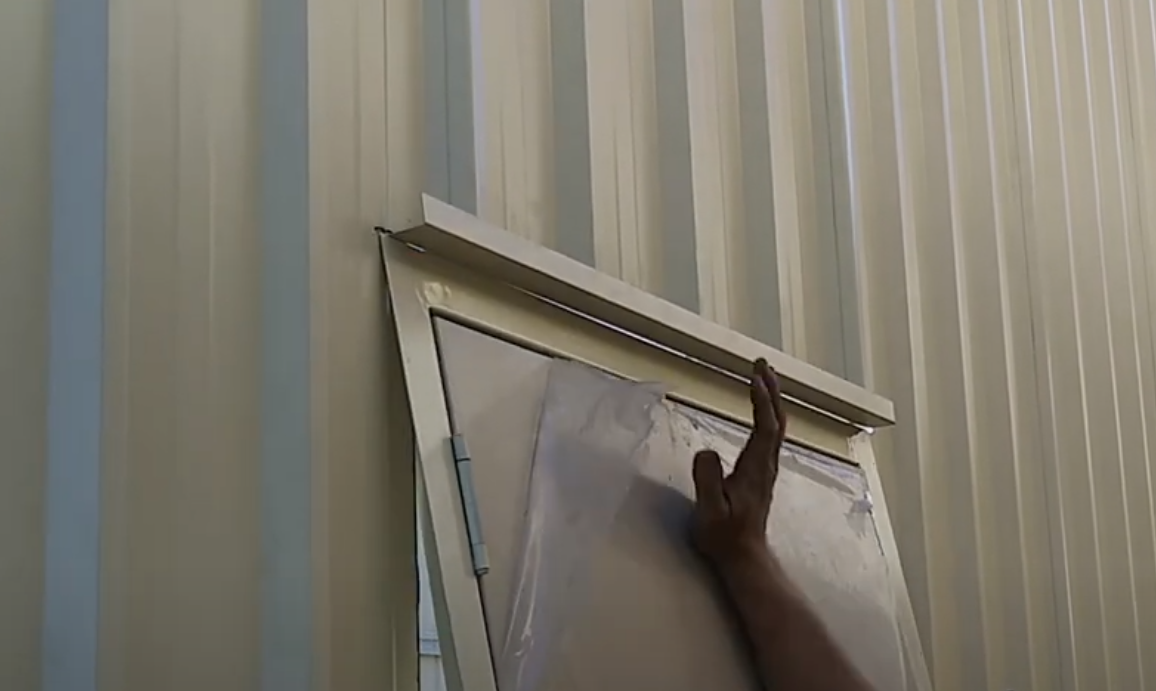
Install the J-Flashing
Attach the J-flashing to the top of the door opening. This will help direct water away from the door and prevent leaks.
Insert the Door
Slide the door into the prepared opening. Ensure it fits snugly and aligns properly with the shed frame.
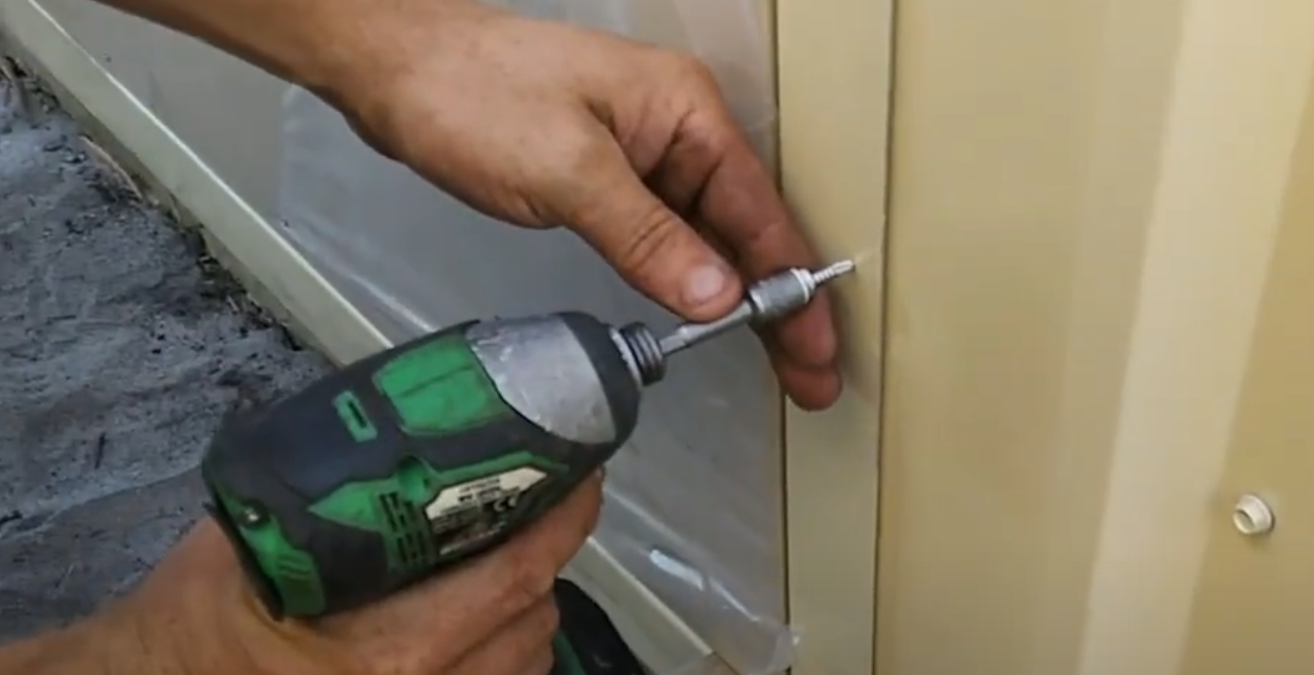
Tek the Door On
Use structural Tek screws to secure the door to the shed frame. Start at the top and work your way down, ensuring the door is level and square.
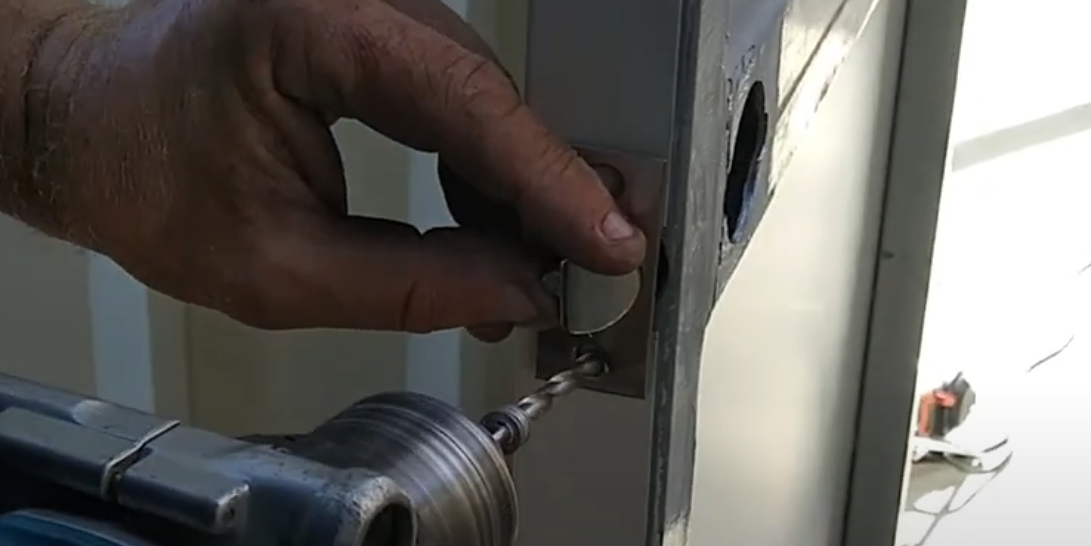
Drill Holes for the Locking Bar
Measure and mark the positions for the locking bar on the door. Drill holes using a drill bit appropriate for the size of the locking bar.
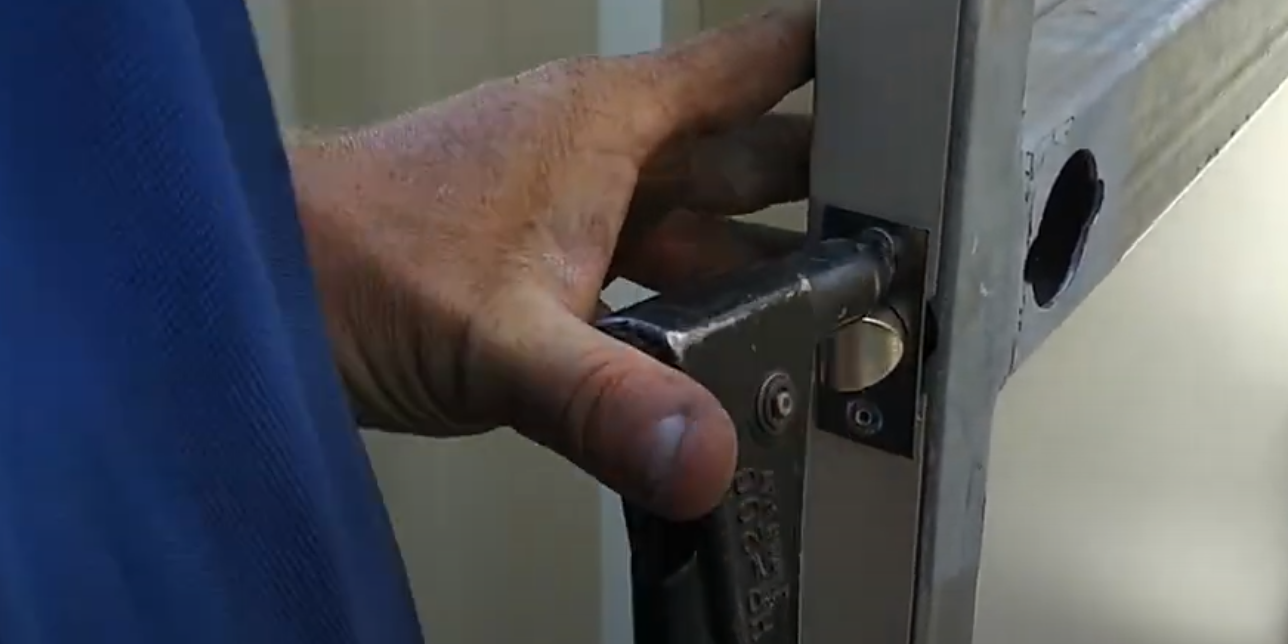
Rivet the Lock
Position the lock in place and use a rivet gun to secure it with countersunk rivets. Ensure the lock is firmly attached and functions correctly.
Make a Hole for the Lock
Drill a hole in the door for the lock mechanism. Ensure the hole is clean and free of debris for smooth operation.

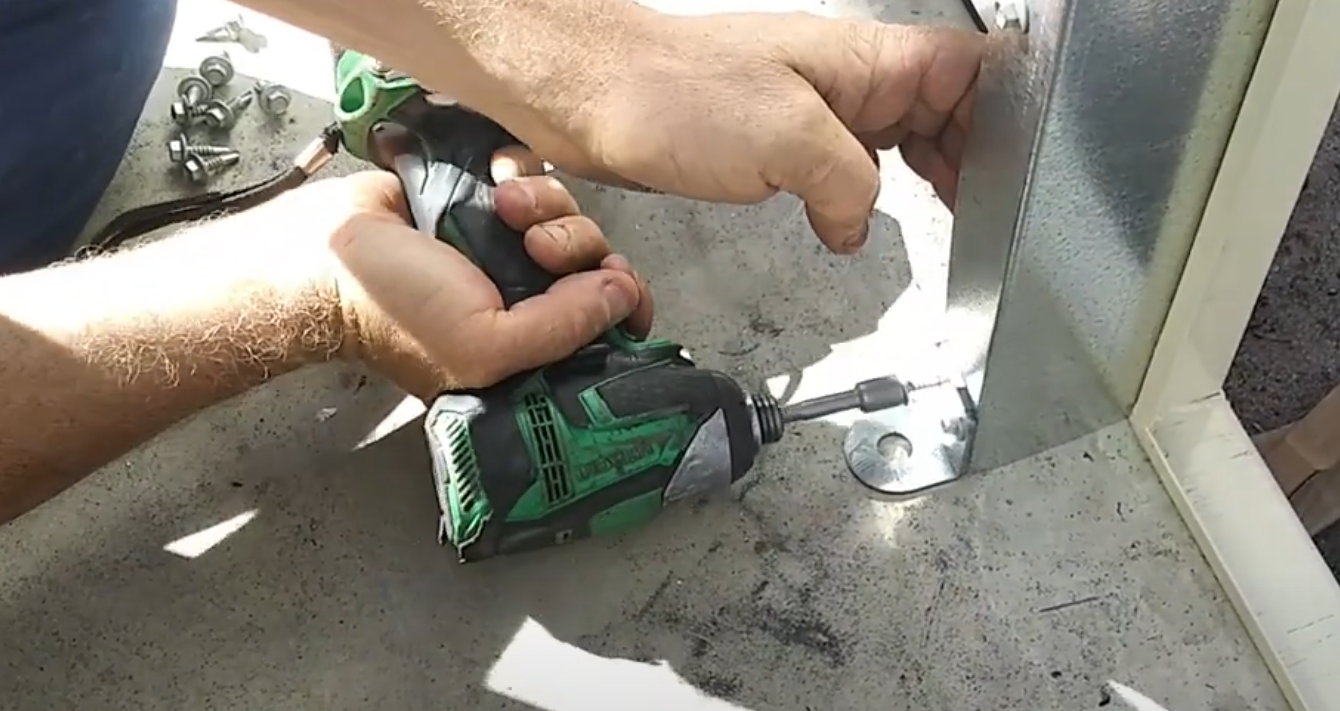
Attach Holding Down Brackets
Position the holding down brackets at the base of the door frame. Use Tek screws to secure them in place, ensuring the door is firmly anchored.
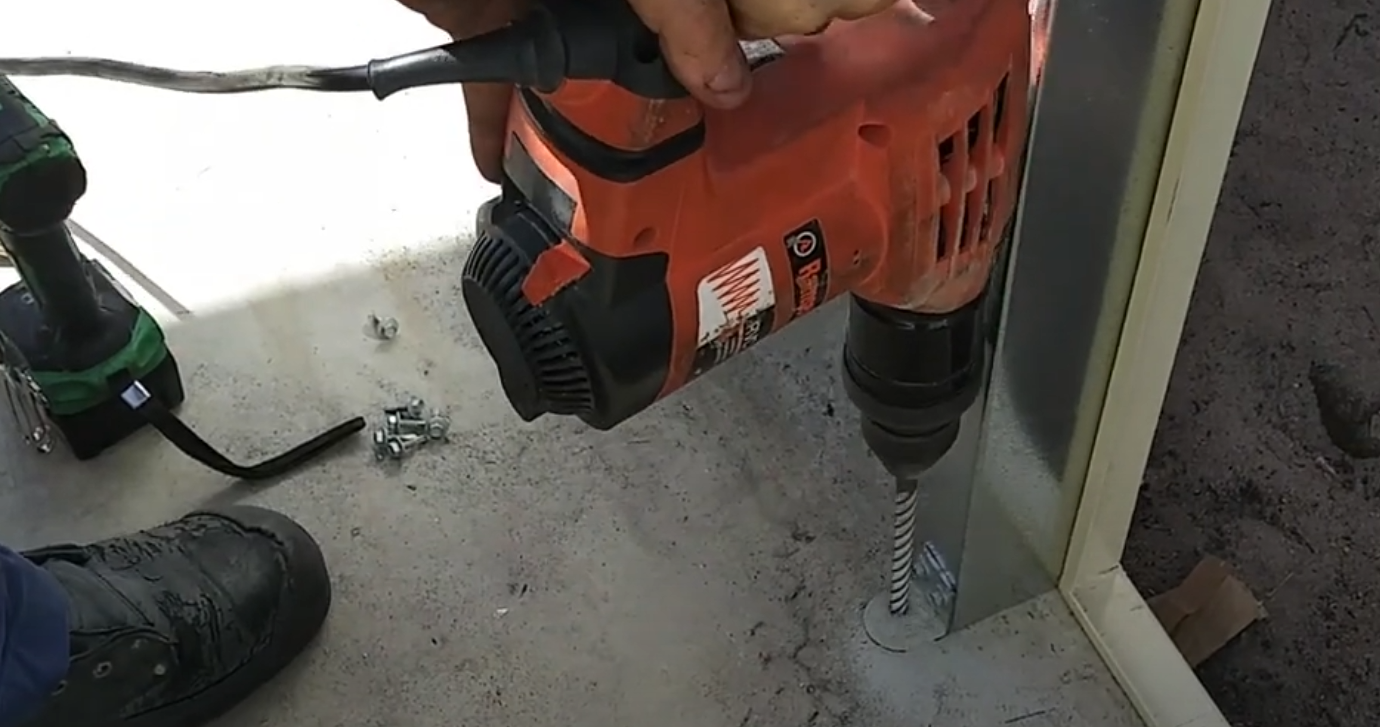
Drill Holes for Dynabolts
Measure and mark the positions for the M12 dynabolts on the shed floor. Use a hammer drill to create the holes, ensuring they are deep enough for the dynabolts.
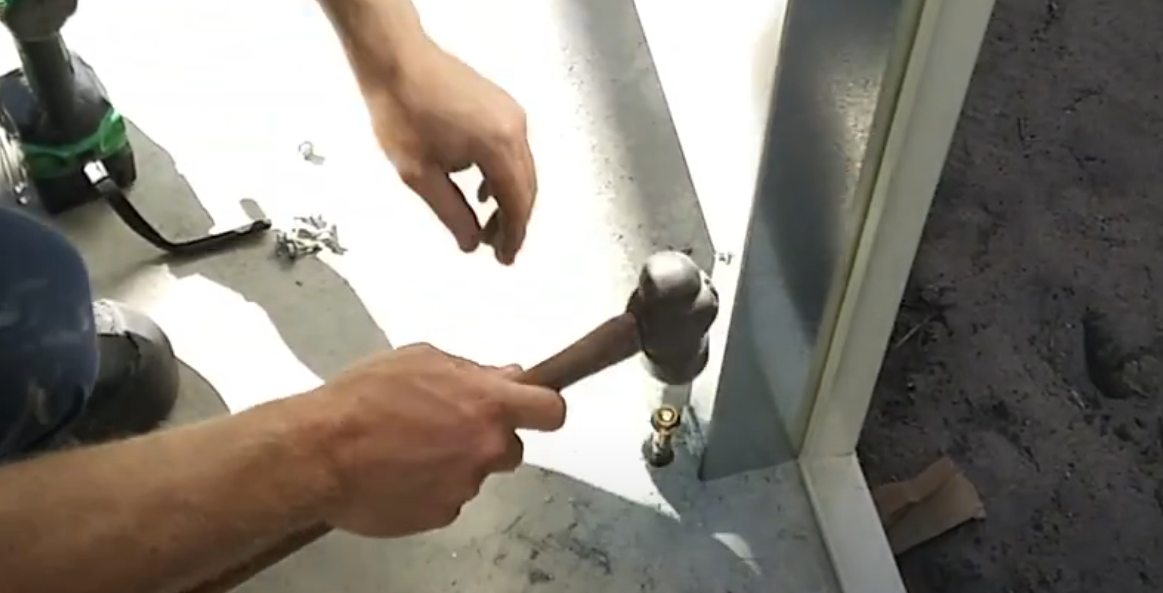
Install Dynabolts
Insert the M12 dynabolts into the drilled holes and tighten them using a spanner. Ensure they are securely fastened to provide additional stability to the door.
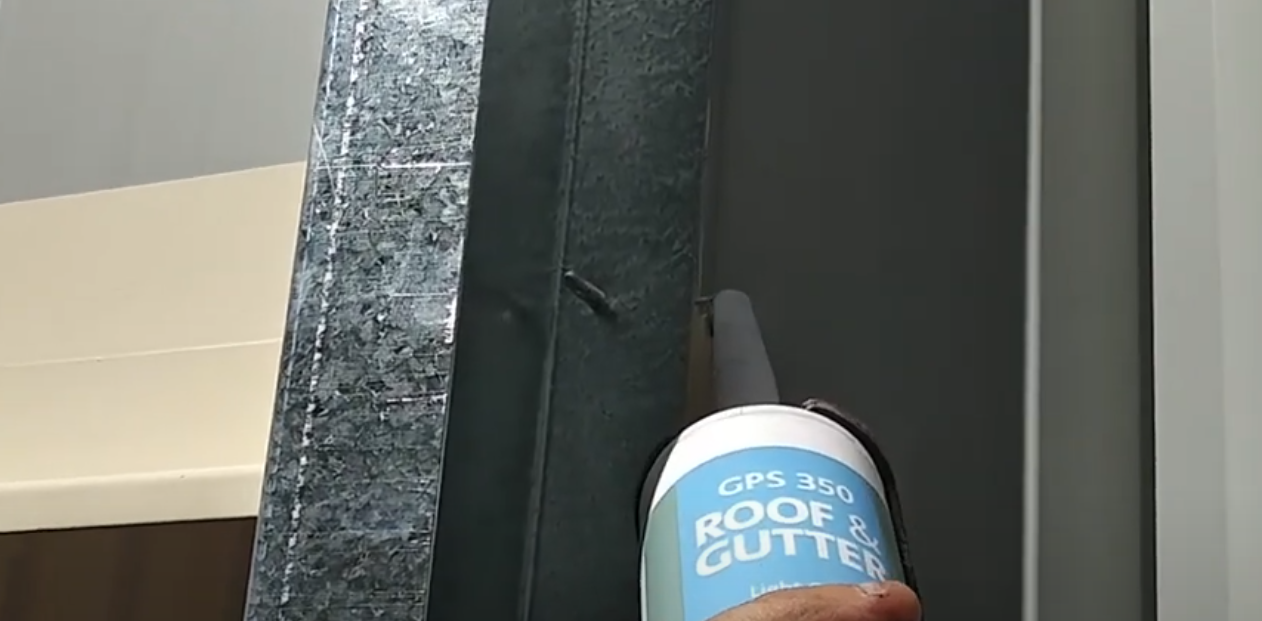
Silicone J-Flashing
Apply a generous amount of silicone to the back of the J-flashing. This will create a watertight seal and prevent any potential leaks.
Final Checks
- Ensure the door opens and closes smoothly
- Test the lock and door knob for functionality
- Inspect for gaps and apply additional silicone if needed
By following these steps, you'll have a securely installed PA door for your shed. Always wear safety glasses and work carefully!